A field-by-field walkthrough for builders participating in a Parade of Homes
If you’re a builder in a Parade of Homes powered by ParadeSmart, your parade organizer has already set up your account — there’s nothing to register or sign up for. This guide walks through everything you’ll do on your end: logging in, updating your builder profile, and entering the details visitors will see when they browse your home in the app and on the website.
Logging In
Your builder login is created automatically by your parade organizer, so there’s no account to create. Your organizer will provide your username and password directly.
- Go to https://app.paradesmart.com/accounts/login/
- Enter the username and password provided by your parade organizer
- Click Login — you’ll land on your builder dashboard
Forgot your password? For security reasons, passwords cannot be viewed or recovered, even by ParadeSmart. Your parade organizer can set a new one for you at any time — just ask.
Seeing a “Forbidden (403)” or “CSRF verification failed” error? This usually happens if you have multiple login tabs open or a restored old browser tab. Click into the address bar, press Enter to reload the page, and try again.
Updating Your Builder Profile
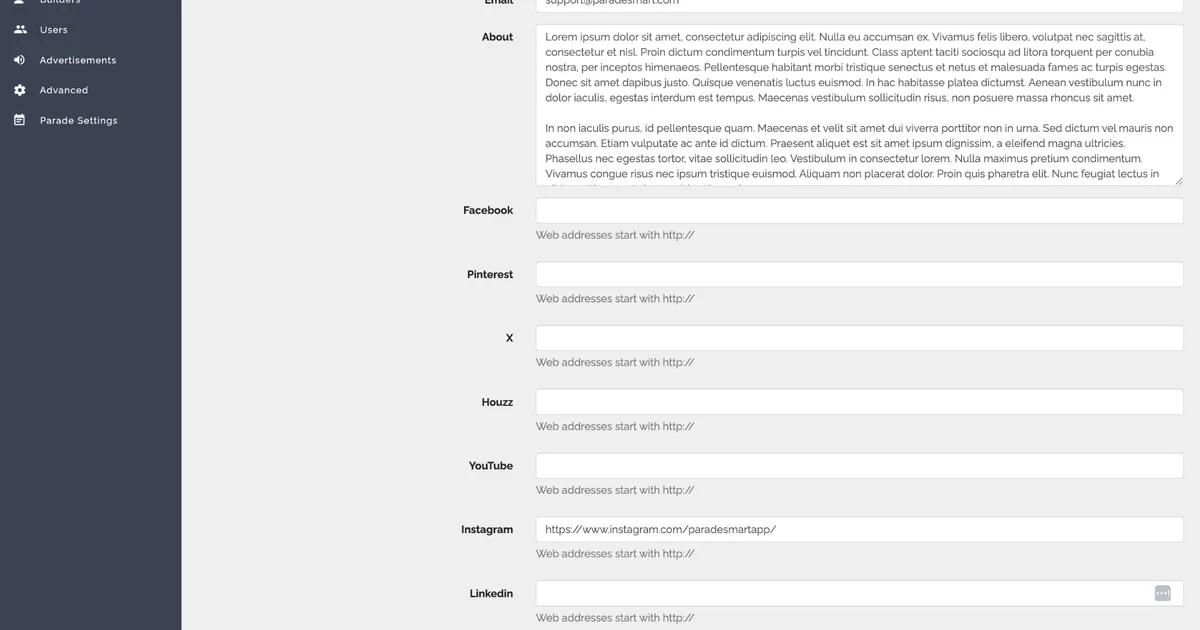
Your builder profile is what visitors see when they tap your company name in the app. It can include your logo, an About section, and your contact information.
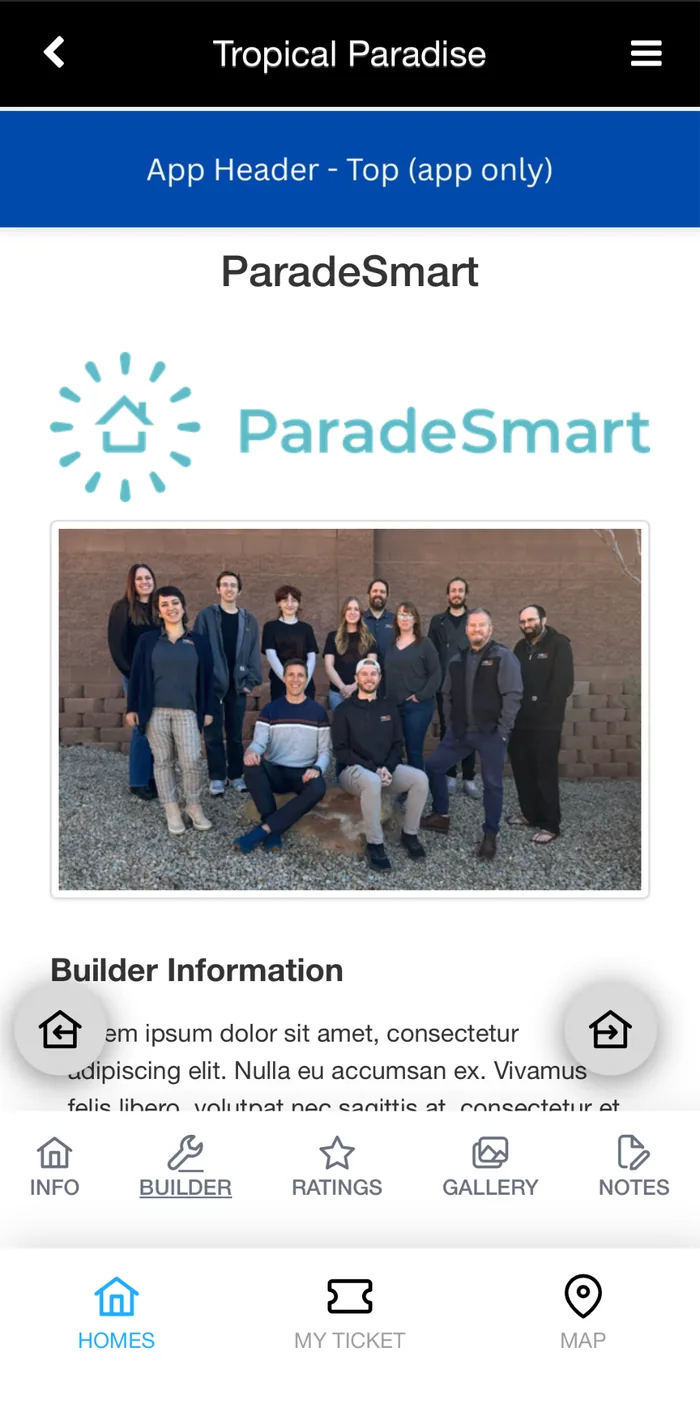
- From your dashboard, find your builder profile and click Edit
- Upload your company logo and profile photo
- Write a short About section — a couple of friendly sentences about your company is perfect
- Add your email, website, phone, and social media links
- Click Save
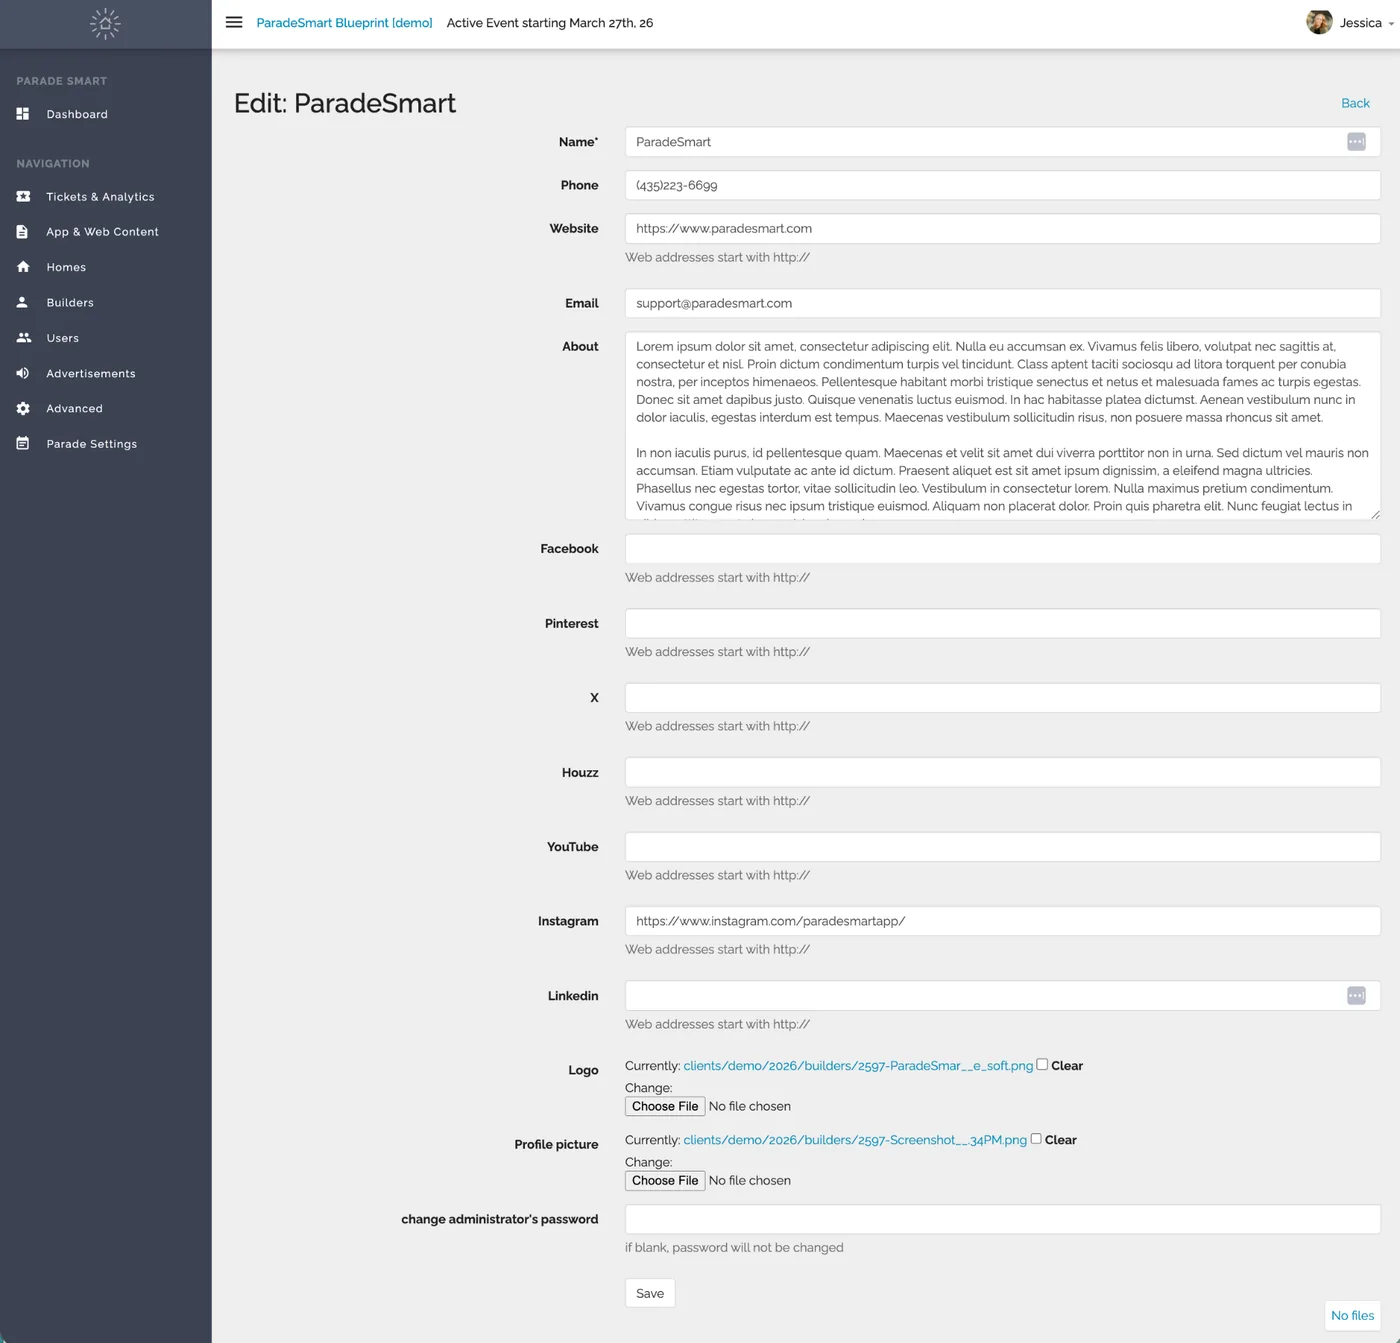
Heads up: Your builder profile will only appear in the app if it includes an About section or a logo. If your profile seems to be missing, that’s usually why.
Entering Your Home Information
This is the information visitors will see when they browse the parade. Complete, accurate info makes your home easier to find and more appealing in the listings. Below is every field, what it means, and what to enter. Your event may have additional fields beyond these.
Basic Info
| Field | What to enter |
|---|---|
| Home / Model Name | The name that appears in the app’s listings — usually your plan or model name (for example, “The Aspen”). |
| Home / Model Description | A description of the home. Highlight what makes it special: design features, finishes, the story behind it. This is your chance to sell the experience. |
| Primary Image | Your rendering, front elevation, or main photo — the first thing visitors see in the listings. If nothing is uploaded, a “Coming Soon” image displays instead. |
| Street Address | First line only. No city, state, or zip — those have their own fields. |
| City | The city the home is located in. |
| Written Directions | Helpful turn-by-turn notes, especially for homes in new developments where GPS apps may struggle. Example: “From Main St, turn east on Canyon Rd, follow signs past the model home.” |
Pricing
| Field | What to enter |
|---|---|
| Price | The price of the home. Numbers only work best (no $ or commas needed). |
| Price Without Lot | The base price of the model, or the price without the lot. |
| Is this home for sale? | Yes or No. |
Location
| Field | What to enter |
|---|---|
| Latitude | Numbers, minus signs, and periods only (example: 40.760780). See below for how to find this. |
| Longitude | Numbers, minus signs, and periods only (example: -111.891045). See below for how to find this. |
Home Details
| Field | What to enter |
|---|---|
| SQFT | Total square footage. Numbers only. |
| Bedrooms | Number of bedrooms. |
| Bathrooms | Number of bathrooms. |
| Garages | Number of garage stalls. Numbers only. |
| Floors | Number of floors/levels. |
| Subdivision | The name of the subdivision or community. |
| Subdivision Info | Any extra details about the community: amenities, HOA info, nearby attractions. |
Media
| Field | What to enter |
|---|---|
| Video Tour | A YouTube or Vimeo embed URL — not your company website. See below for exactly how to find the right link. |
| 360 Virtual Tour | Your Matterport link. See below. |
Finding Your Latitude and Longitude
Accurate coordinates put your home’s pin in exactly the right spot on the parade map. The address alone is often not enough, especially in new developments. Here’s the easiest way to find them using Google Maps:
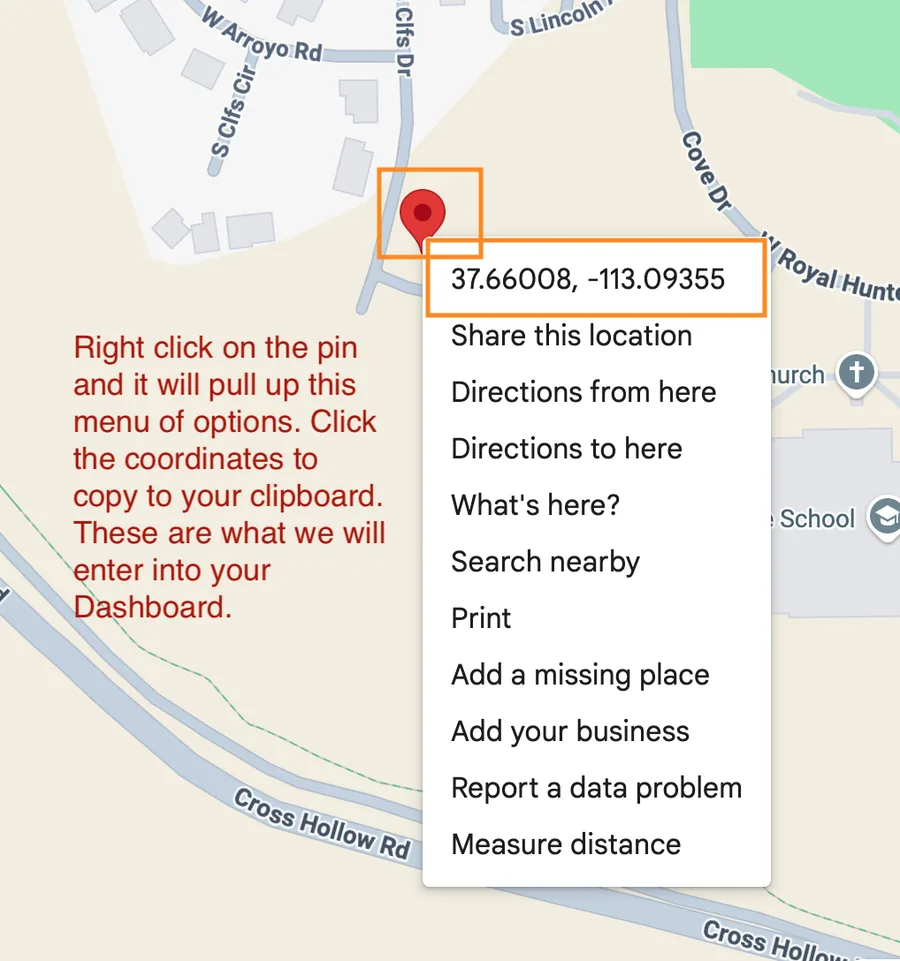
- Open Google Maps and type in the address to see what location it gives you. Newer subdivisions may not be recorded yet — in that case, right-click a well-established road next to the subdivision instead.
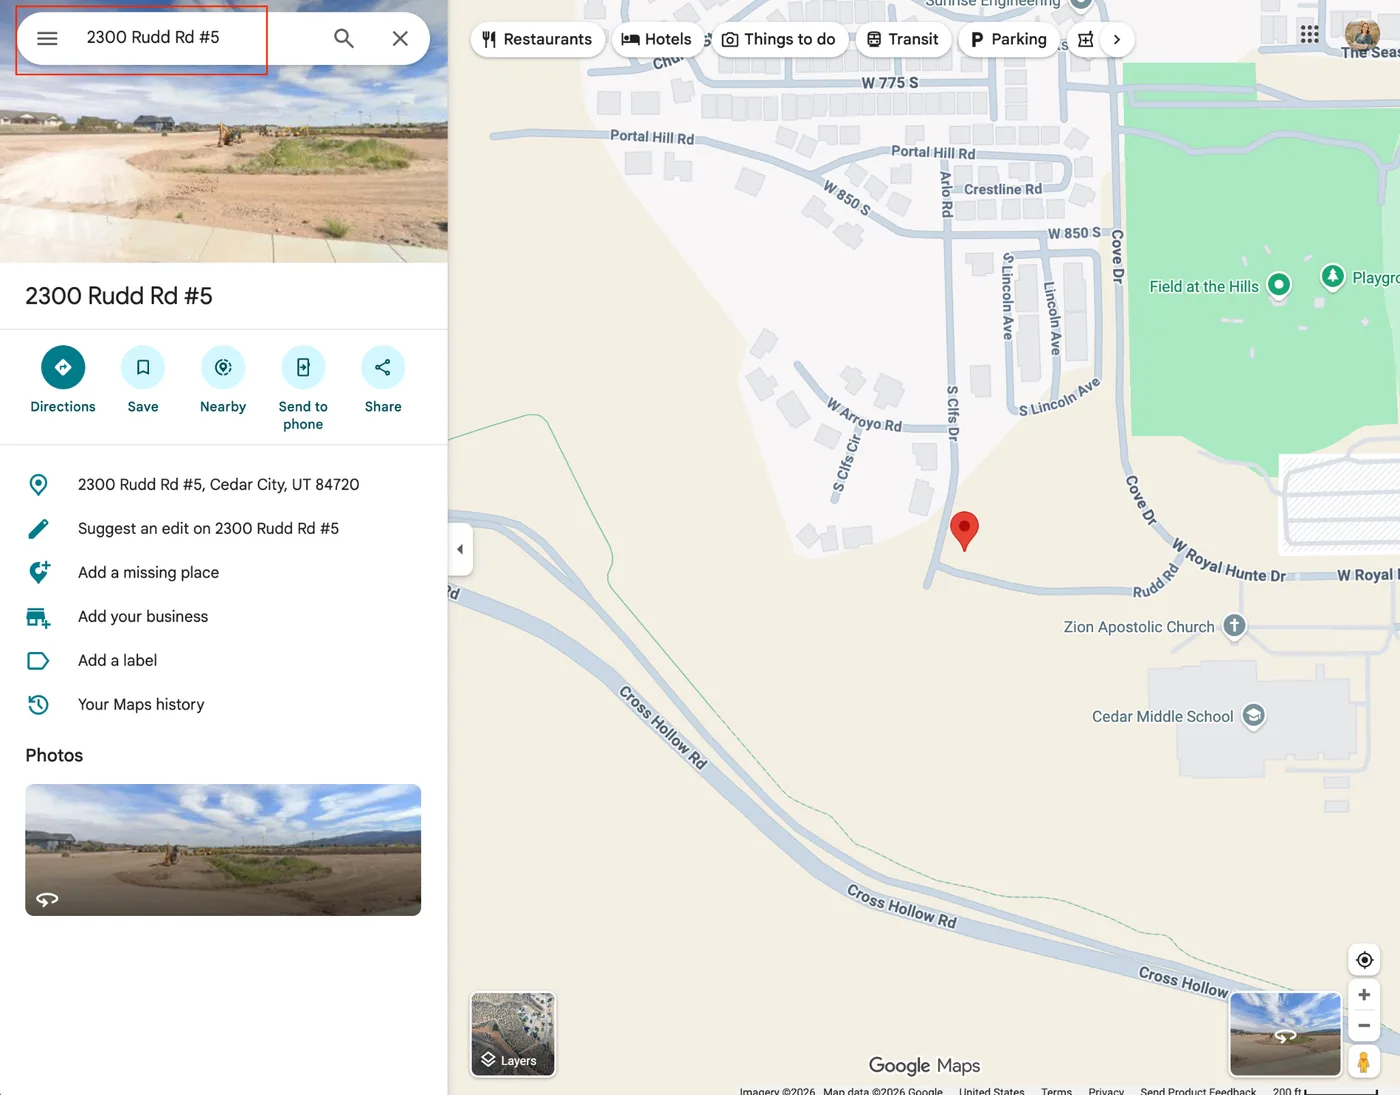
- Right-click the pin. A secondary menu pops up showing the coordinates. Click those to copy them to your clipboard.
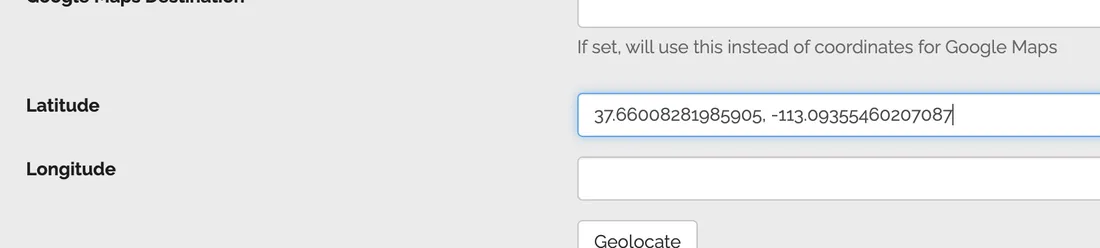
- With the coordinates copied, paste the full line into the Latitude field, then highlight, cut, and remove the longitude portion. Paste the longitude into the Longitude field.
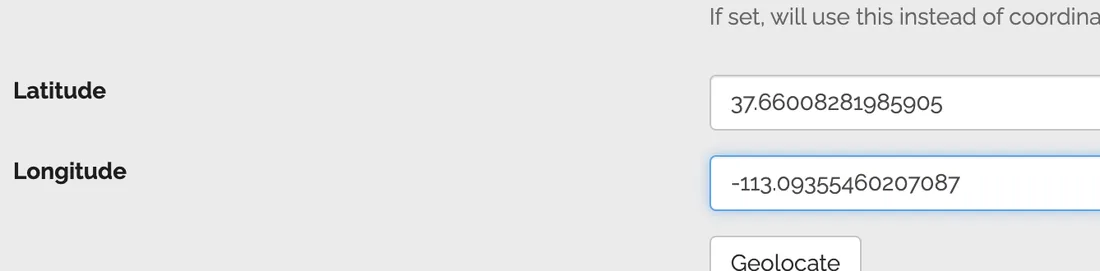
- Do not press the Geolocate button — just paste your numbers, scroll to the bottom of the page, and click Save. It will auto-update the map on the edit details page.
- Save. The pin should move to the correct location.
- Refresh the page to confirm the coordinates saved.
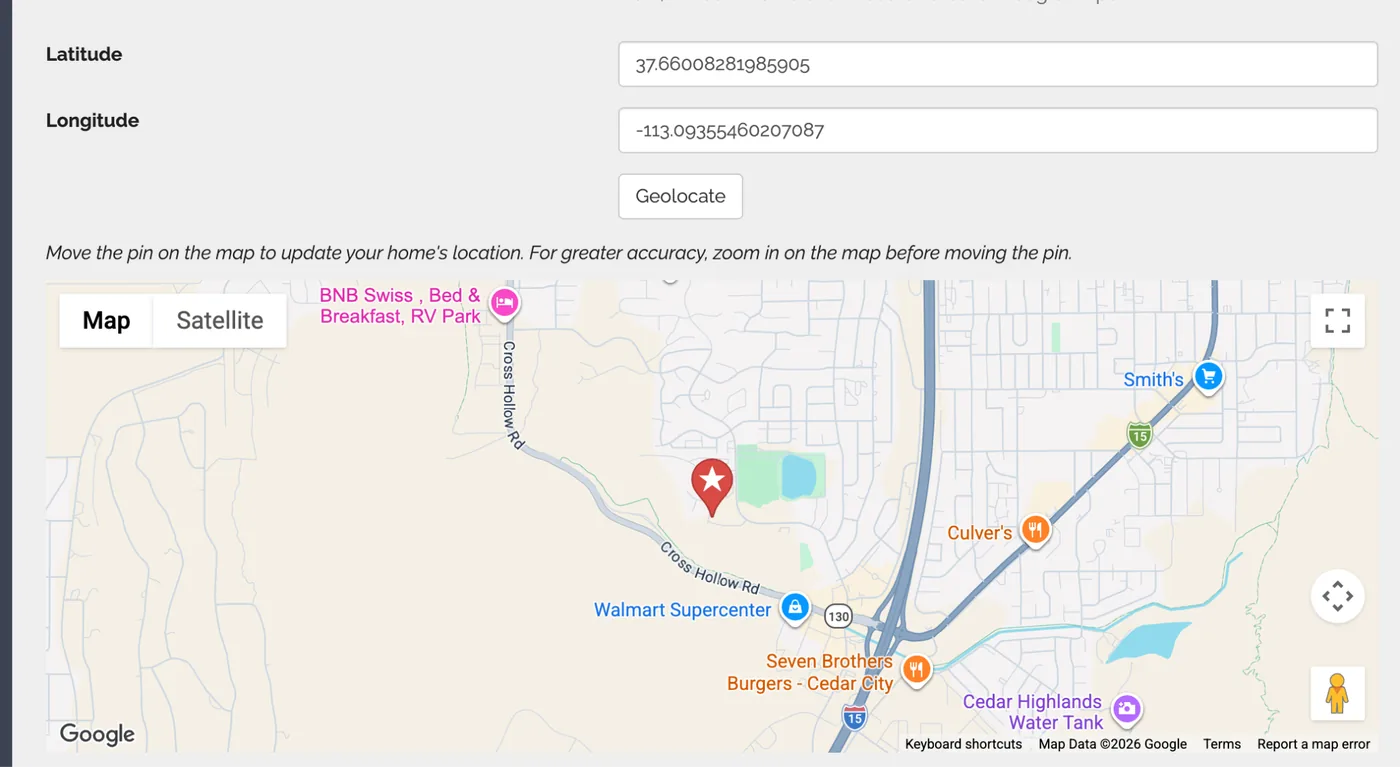
Good to know: The website map updates instantly, but the app map can take up to 24 hours to show your new pin location. Don’t worry if it doesn’t move right away.
Google Maps and Apple Maps Destination Fields
These two optional fields control where visitors are sent when they tap the “Directions” button in the app. They’re a backup for when a home’s GPS coordinates aren’t recognized correctly by Apple or Google Maps — which happens often with brand-new roads and developments.
Enter a plain street address only, like 21524 Riva Ridge, Tyler TX 75704. Do not enter a website URL or a Google Maps share link — these fields need a typed-out address that the map apps can recognize, nothing else.
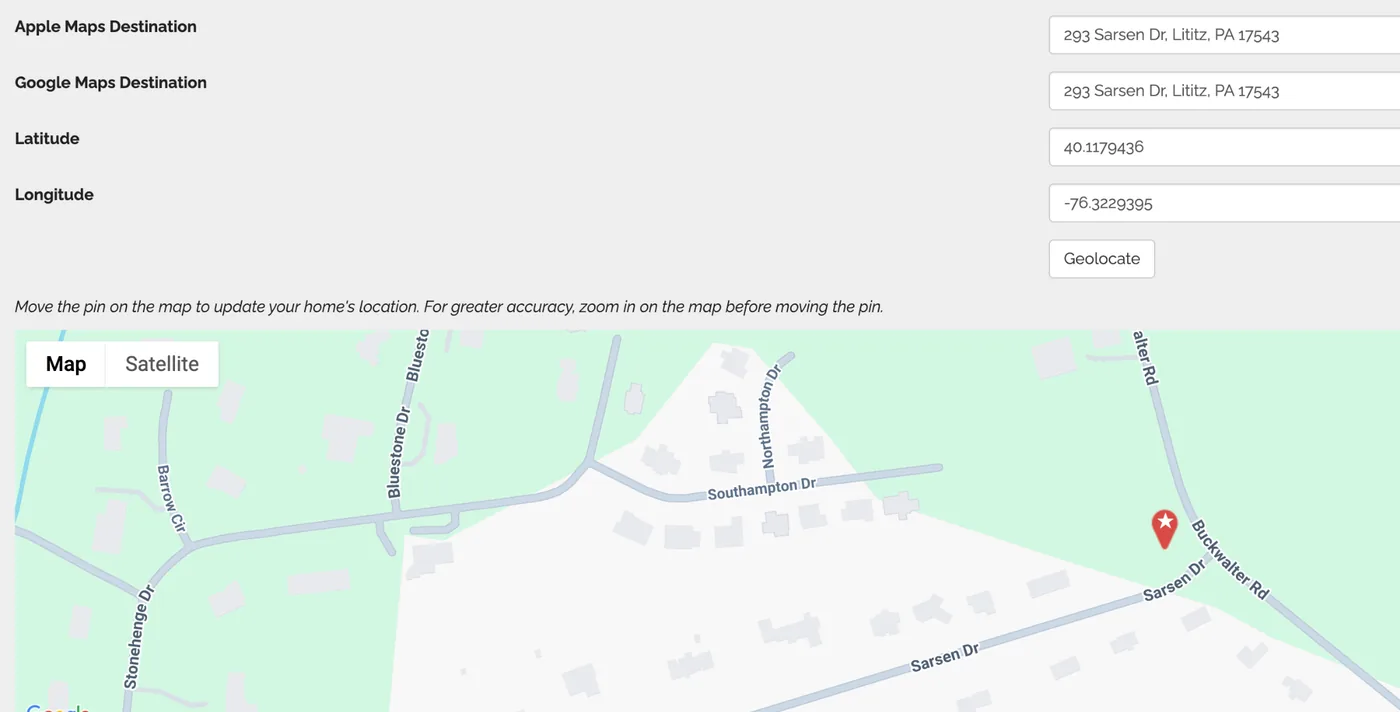
How it works:
- If a Google or Apple destination address is entered, the app tries that address first when a visitor taps Directions.
- If the address can’t be resolved, the app falls back to the GPS coordinates.
- If these fields are left blank, the app always uses the GPS coordinates.
Our recommendations:
- Always enter GPS coordinates first — that’s the most accurate and reliable method.
- Only use these address fields if the home is new or hard to find on maps, or if you see inaccurate directions while testing.
- Test on both an iPhone and an Android device. Apple Maps and Google Maps can behave differently.
If directions still send people the wrong way: digital maps sometimes just don’t know about new roads yet. Move your pin to the closest established street, explain the last steps in the Written Directions field, and add signage on event days to guide visitors the rest of the way.
Video Tour (YouTube or Vimeo)
This field needs the link to your video itself — not your company website and not the page the video lives on. A regular website URL will not play in the app.
YouTube
- Open your video on YouTube
- Click Share below the video
- Copy the short link that appears (it looks like https://youtu.be/abc123)
- Paste it into the Video Tour field
Vimeo
- Open your video on Vimeo and click the Share button
- In the share window, look at the Embed section — not the regular link at the top
- Inside the embed code, find the URL that starts with https://player.vimeo.com/video/… and copy just that link
- Paste it into the Video Tour field
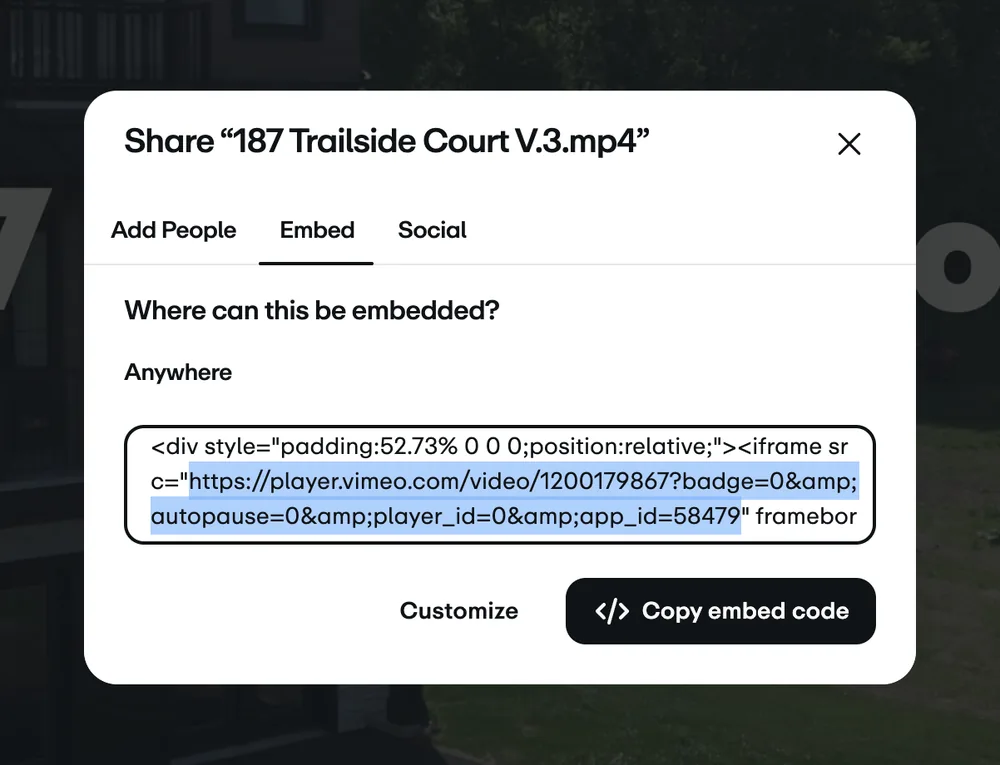
Working with a videographer? Make sure they set the video’s share settings so it’s embeddable on a website and inside an app. Private or restricted videos will show up as a blank box for visitors.
360 Virtual Tour (Matterport)
- Open your tour on Matterport
- Click the Share option for the tour
- Copy the share link (it looks like https://my.matterport.com/show/?m=abc123)
- Paste it into the 360 Virtual Tour field
Tip: Make sure the Matterport tour’s privacy setting allows public link sharing. If the tour is set to private, visitors won’t be able to view it.
Before You Finish: Quick Checklist
- Preview your home listing to make sure everything looks right
- Check your home’s pin on the map and tap Directions to confirm it routes correctly
- Play your video tour and 360 tour to confirm they load
- Double-check your primary image — if you see a “Coming Soon” placeholder, your image didn’t upload
- Confirm your builder profile shows your logo and About section
Questions? Reach out to your parade organizer first, since they manage your event. For anything specific to the ParadeSmart platform, you can also visit our Getting Started guide in the Help Center.